Get Solutions

Finding solutions with Technologies

How to Configure and Setup SVN Server on Ubuntu server with https access


To install SVN server, run this command at the command prompt:
sudo apt-get install subversion apache2 libapache2-svn

Verify the installed version of Subversion software:
svn --version

We want to configure the apache in such a way that it’ll run on HTTPs and for this we need to enable ssl Apache2 module with a2enmod:
sudo a2enmod ssl

It will suggest you to restart apache;ignore that message for now.
Create a directory inside the /etc/apache2/ directory,where we’ll save the server key and certificate:
sudo mkdir /etc/apache2/ssl

Use this command for creating the self-signed SSL certificate and the server key that protects it, and save them into the new directory (/etc/apache2/ssl/):
sudo openssl req -new -x509 -days 365 -nodes -out /etc/apache2/ssl/apache.pem -keyout /etc/apache2/ssl/apache.key

Note: Fill the information accordingly!
Edit the ports.conf file:
sudo nano /etc/apache2/ports.conf

Ensure that port 443 is defined as follows and add the NameVirtualHost for port 443:
NameVirtualHost *:443
Listen 443
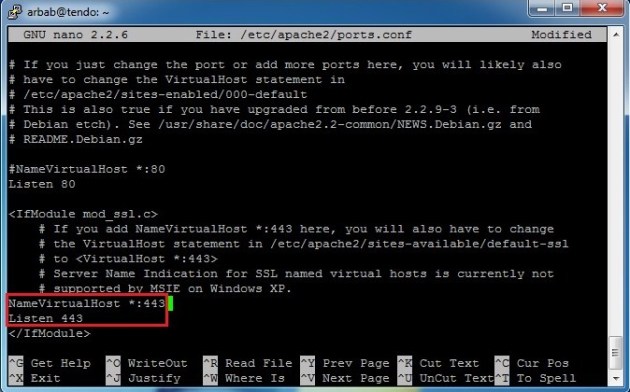
Open up the SSL config file:
sudo nano /etc/apache2/sites-available/default-ssl

Comment out the default certificate and key:
#SSLCertificateFile /etc/ssl/certs/ssl-cert-snakeoil.pem
#SSLCertificateKeyFile /etc/ssl/private/ssl-cert-snakeoil.key
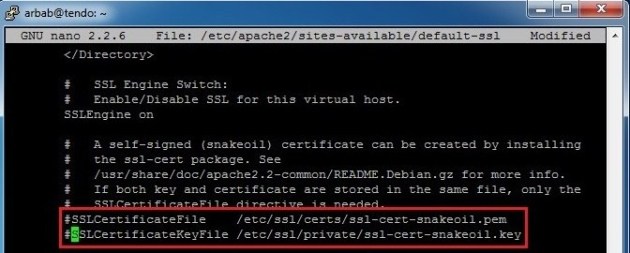
And add the newly created certificate and key:
SSLCertificateFile /etc/apache2/ssl/apache.pem
SSLCertificateKeyFile /etc/apache2/ssl/apache.key
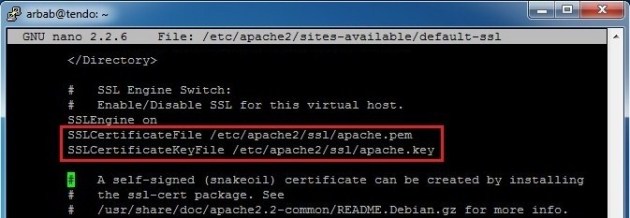
Now we need to configure the SSL site:
sudo a2ensite default-ssl

Restart the Apache service:
sudo /etc/init.d/apache2 restart

Now we should be able to connect to the server through SSL using Chrome or any other browser:

Verify the Certificate, that it’s the same that we created and configured:
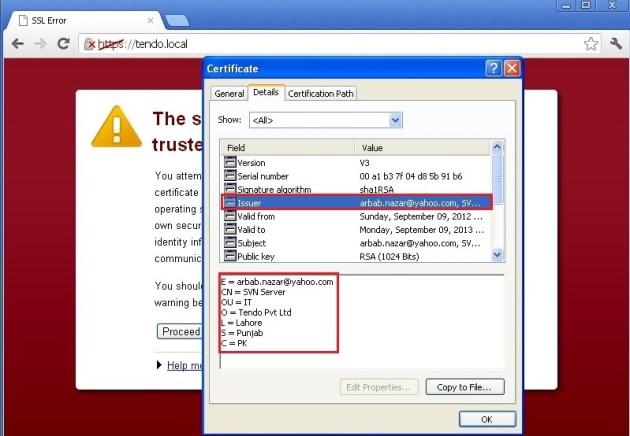
Next, we need to configure the SVN Server for this, make a directory where you want to keep the svn repositories and edit the dav_svn.conf file:
sudo mkdir /svn
sudo nano /etc/apache2/mods-enabled/dav_svn.conf

Delete all the data and make it simple like this:
<Location /svn>
DAV svn
SVNParentPath /svn
AuthType Basic
AuthName "Subversion Repository"
AuthUserFile /etc/apache2/dav_svn.passwd
Require valid-user
SSLRequireSSL
</Location>
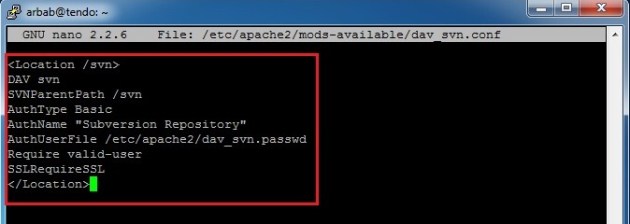
To create a svn user , use the following command:
sudo htpasswd -cm /etc/apache2/dav_svn.passwd arbab

We only need to use the -c option for the FIRST TIME, when you create a user, after that you will only use the   -m option.
Move to the folder, where you want to keep your repositories and create your first repository:
cd /svn
sudo svnadmin create myrepo

Make sure you set the permissions of the /svn directory to apache with the following command:
sudo chown -R www-data:www-data /svn

Restart the apache2 service:
sudo /etc/init.d/apache2 restart

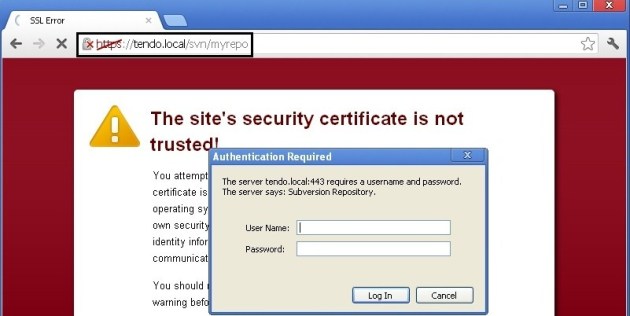
Let’s test with the browser that our svn repository is accessible now through HTTPs at following url:
https://tendo.local/svn/myrepo
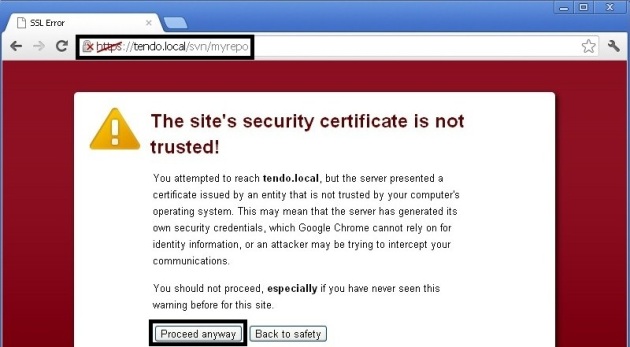
Click “Proceed anyway“, enter the username and password:
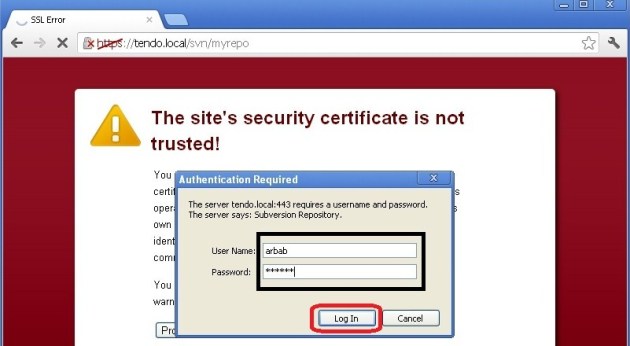
Yes, It is working :-)

Note: Our SVN Server is also working with http:
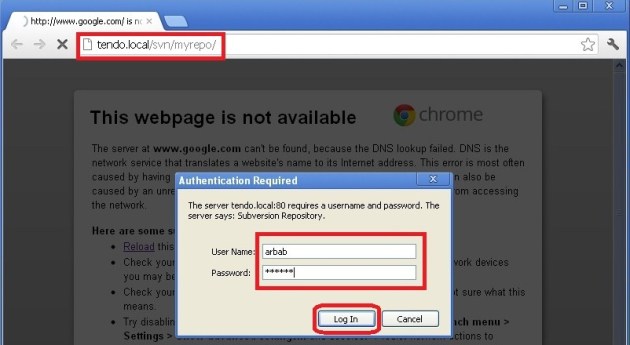

But, we don’t want that users access it through http, we only want to access it through https. To fix this, we need to edit the ports.conf file:
sudo nano /etc/apache2/ports.conf

Comment these two lines:
#NameVirtualHost *:80
#Listen 80

Restart the apache2 service:
sudo /etc/init.d/apache2 restart

Now, try to access it through http, it’ll give us the rejection error:

But with https, we can still access the svn repositories:

 More Details Click Here
       Author by:-rbgeek.wordpress

How to block video streaming with Squid


In office like Software House, they can’t ban the facebook because many of the web application using facebook login to register an account and has been used many FB api for showing FB updates in their platform. But sometimes,they are worry about the bandwidth that their users waste in watching videos on facebook. So, this is a solution for those people :-) (With this they can block about 95% videos)

Scenario:
In this scenario, Mikrotik will work as dhcp, dns, and default gateway for local network. Ubuntu 12.04 with 2 NICs installed (eth0, eth1). We’ll assume eth0 will be the connected to the gateway, and eth1 will be connected to the switch.
Install the squid3,  ebtables  and bridge-utils with the following command:
sudo apt-get install squid3 ebtables bridge-utils

Edit the /etc/network/interfaces file:
sudo nano /etc/network/interfaces

Delete all the settings for eth0 and eth1:

Edit the /etc/rc.local file:
sudo nano /etc/rc.local

Add following to the rc.local before “exit 0:
#!/bin/sh -e

###############Bridge Interface###################
brctl addbr br0
brctl addif br0 eth0
brctl addif br0 eth1
ifconfig eth0 0.0.0.0 promisc up
ifconfig eth1 0.0.0.0 promisc up
ifconfig br0 10.10.10.250 netmask 255.255.255.0 up
route add default gw 10.10.10.1 dev br0
##################################################

##########################################Proxy Rule#######################################
ebtables -t broute -A BROUTING -p IPv4 --ip-protocol 6 --ip-destination-port 80 -j redirect --redirect-target ACCEPT
iptables -t nat -A PREROUTING -i br0 -p tcp --dport 80 -j REDIRECT --to-port 3128
iptables -t nat -A PREROUTING -i eth0 -p tcp --dport 80 -j REDIRECT --to-port 3128
iptables -t nat -A PREROUTING -i eth1 -p tcp --dport 80 -j REDIRECT --to-port 3128
iptables -t nat -A PREROUTING -i br0 -p tcp --dport 80 -j REDIRECT --to-port 3128
###########################################################################################

exit 0

Note: eth0 and eth1 doesn’t have ip address, instead br0 has an ip address 10.10.10.250/24 for remotely management purpose.
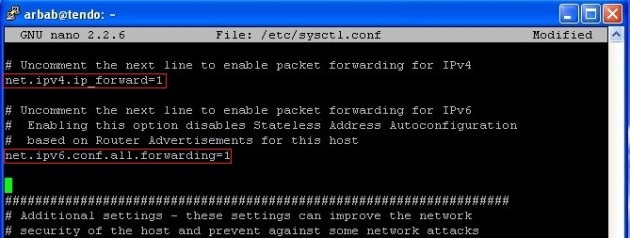
To enable ip forwarding, edit /etc/sysctl.conf file:
sudo nano /etc/sysctl.conf
Uncomment the following lines:
net.ipv4.ip_forward=1
net.ipv6.conf.all.forwarding=1

Reboot the system or restart networking service:
sudo /etc/init.d/networking restart

Note: If you are facing a problem then reboot the system once!
Make a backup of original squid.conf file:
sudo cp /etc/squid3/squid.conf /etc/squid3/squid.conf.original

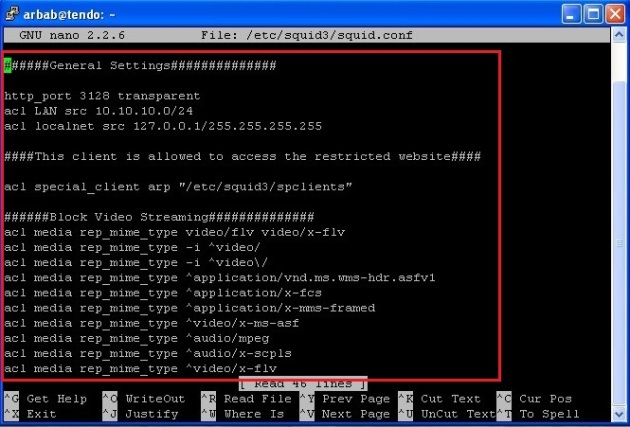
Edit the squid.conf file:
sudo nano /etc/squid3/squid.conf

Delete everything and add these lines:
######General Settings##############

http_port 3128 transparent
acl LAN src 10.10.10.0/24
acl localnet src 127.0.0.1/255.255.255.255

####This client is allowed to access the restricted website####

acl special_client arp "/etc/squid3/spclients"

######Block Video Streaming##############

acl media rep_mime_type video/flv video/x-flv
acl media rep_mime_type -i ^video/
acl media rep_mime_type -i ^video\/
#acl media rep_mime_type ^application/x-shockwave-flash
acl media rep_mime_type ^application/vnd.ms.wms-hdr.asfv1
acl media rep_mime_type ^application/x-fcs
acl media rep_mime_type ^application/x-mms-framed
acl media rep_mime_type ^video/x-ms-asf
acl media rep_mime_type ^audio/mpeg
acl media rep_mime_type ^audio/x-scpls
acl media rep_mime_type ^video/x-flv
acl media rep_mime_type ^video/mpeg4
acl media rep_mime_type ms-hdr
acl media rep_mime_type x-fcs
acl mediapr urlpath_regex \.flv(\?.*)?$
acl mediapr urlpath_regex -i \.(avi|mp4|mov|m4v|mkv|flv)(\?.*)?$
acl mediapr urlpath_regex -i \.(mpg|mpeg|avi|mov|flv|wmv|mkv|rmvb)(\?.*)?$

##########Access Lists#########

http_access allow mediapr special_client
http_reply_access allow media special_client

http_access deny mediapr
http_reply_access deny media

http_access allow LAN
http_access allow localnet

########Log File##########

access_log /var/log/squid3/access.log

###### No cache anything###

no_cache deny all

Note: If you enable the blue line by removing the # sign in front of it then squid will block all the flash enable websites even if they are not video streaming sites.
Restart the squid3 service:
sudo service squid3 restart

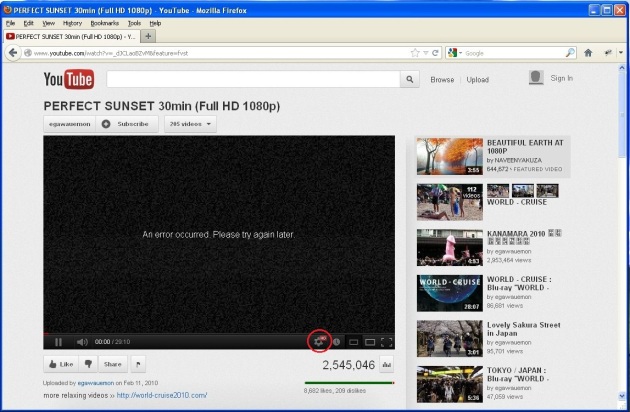
Check the youtube.com from the client machine:

Squid will even block the HD videos:

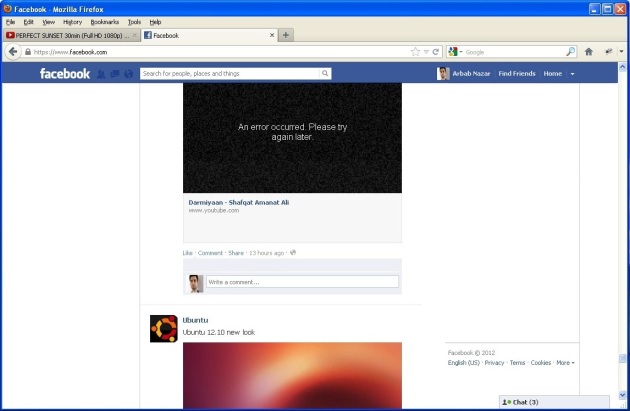
Check the videos on facebook.com:

Check the squid3 log for verification, that it’s really block the video streaming:
sudo tail -f /var/log/squid3/access.log

Suppose we want to give access to one of our developer to the video streaming sites for testing purpose, create a file and add the mac address of this developer’s machine in this file(in my case this file is named as spclients and it located at /etc/squid3/). The reason to add the mac address instead of ip address is that, here squid is working as a transparent bridge on layer 2 and mac address is working on layer 2 not an ip address.
Find the mac address of developer’s machine by using this command:
ipconfig /all

Create a file that we discuss above:
sudo nano /etc/squid3/spclients

Add the mac address here:

Restart the squid3 service:
sudo service squid3 restart

Now check the youtube.com from the developer’s machine that we added as an exception:

Also check the facebook.com videos:

Yes, it’s working……..

 More Details click Here
     author by:-rbgeek.wordpress